Using Blender for 3D Minecraft Projects opens up a world of possibilities for crafting stunning and intricate creations. Blender, a powerful and versatile 3D modeling software, empowers you to bring your Minecraft visions to life, from detailed custom blocks to dynamic animations and immersive landscapes.
This comprehensive guide delves into the seamless integration of Blender with Minecraft, providing a step-by-step journey through importing models, designing custom assets, animating objects, and finally, seamlessly integrating your creations into the Minecraft world. Whether you’re a seasoned builder or a curious beginner, this guide will equip you with the knowledge and tools to unlock the full potential of Blender in your Minecraft adventures.
Importing Minecraft Models into Blender: Using Blender For 3D Minecraft Projects
Blender is a powerful 3D modeling and animation software that can be used to create stunning visuals for Minecraft projects. One of the most convenient ways to enhance your Minecraft creations is by importing existing models into Blender. This allows you to leverage pre-made assets, customize them to your liking, and integrate them seamlessly into your Minecraft world.
Supported File Formats
Blender supports various file formats for importing Minecraft models, providing flexibility and compatibility with different sources.
- .obj: A widely recognized and versatile format that is compatible with many 3D modeling programs. It’s a good choice for importing simple Minecraft models.
- .fbx: Another popular format that offers support for animation data, making it suitable for importing complex models with moving parts.
- .gltf: A relatively new format that is gaining popularity due to its lightweight nature and efficient handling of textures and animations. It’s an excellent choice for optimizing Minecraft models for Blender.
Optimizing Imported Minecraft Models
Optimizing imported Minecraft models in Blender is crucial for ensuring smooth performance and a visually appealing experience within your Minecraft world.
- Reduce Polygons: Minecraft models often have high polygon counts, which can lead to performance issues. To optimize, use Blender’s tools to simplify the model’s geometry by reducing the number of polygons. This will make the model lighter and faster to render.
- Optimize Textures: Minecraft textures can be large and require significant memory. You can reduce the file size of textures without sacrificing visual quality by using image optimization tools or reducing the resolution of the textures.
- Bake Textures: Baking textures involves combining multiple textures into a single texture map, simplifying the rendering process and improving performance. This can be particularly useful for models with complex materials or lighting setups.
Creating Custom Models and Textures
Blender’s modeling tools empower you to design custom Minecraft blocks, adding a unique touch to your projects. This section explores the process of crafting custom models and applying textures to them, allowing you to create unique and personalized assets.
Modeling Custom Minecraft Blocks, Using Blender for 3D Minecraft Projects
Blender’s modeling tools offer a versatile environment for creating custom Minecraft blocks. The process involves shaping the block’s geometry using various tools and techniques. Here’s a step-by-step guide to modeling a custom Minecraft block:
Start with a basic cube
Create a cube as the foundation of your block.
Modify the cube’s shape
Utilize Blender’s tools, such as the Extrudeand Insettools, to reshape the cube into the desired block form.
Add details
Incorporate intricate details by using Loop Cutsand Beveltools.
Optimize for Minecraft
Ensure your model aligns with Minecraft’s low-polygon style.
Apply modifiers
Utilize modifiers like Subdivision Surfaceto smooth the model’s appearance.
Creating and Applying Textures
Textures breathe life into your Minecraft models, adding visual depth and detail. The process involves creating texture images and applying them to your models.
Texture creation
Utilize image editing software like GIMP or Photoshop to create texture images for your block.
UV unwrapping
In Blender, unwrap your model’s surface to create a 2D representation of its geometry.
Texture mapping
Apply your texture image to the unwrapped UV map, ensuring proper alignment.
Texture optimization
Optimize your textures for Minecraft’s resolution requirements, ensuring efficient rendering.
Workflow for Creating Custom Minecraft Assets
A streamlined workflow enhances the efficiency of creating custom Minecraft assets in Blender.
Model creation
Begin by designing the 3D model of your asset using Blender’s modeling tools.
Texture creation
Simultaneously, create the texture images for your asset in an image editing software.
UV unwrapping
Once the model is finalized, unwrap its surface to create a UV map.
Texture mapping
Apply the created textures to the UV map, ensuring proper alignment.
Exporting
Export your model and textures in a format compatible with Minecraft.
Testing
Import your assets into Minecraft to ensure they function as intended.
Integrating Blender Models into Minecraft
Integrating Blender models into Minecraft opens up a world of possibilities for creating unique and personalized worlds. Whether you’re building intricate structures, designing custom mobs, or crafting unique items, Blender’s powerful tools can help you bring your vision to life.
Exporting Blender Models
The first step is to prepare your Blender model for export. This involves ensuring that the model is properly scaled, textured, and optimized for use in Minecraft.The most common export format for Minecraft models is .obj. This format is supported by both Blender and the Minecraft modding community.
Here’s a step-by-step guide to exporting your Blender model:* Prepare your model:Ensure that all materials, textures, and animations are properly assigned and set up.
Select the model
In the Blender viewport, select the object you want to export.
Export the model
Go to File > Export > Wavefront OBJ (.obj).
Choose a location
Select the folder where you want to save the exported file.
Configure export settings
You can adjust the export settings to control the level of detail and other parameters.
Using Custom Resource Packs
Custom resource packs are essential for integrating Blender models into Minecraft. These packs allow you to override the game’s default textures, models, and other assets. To use a custom resource pack, you’ll need to:* Create a resource pack folder:Create a new folder in your Minecraft resource packs directory (typically located in `%appdata%\.minecraft\resourcepacks`).
Name the folder
Give the folder a descriptive name for your resource pack.
Organize the files
Organize the exported model files, textures, and other assets within the folder.
Enable the resource pack
Launch Minecraft and navigate to the resource pack settings. Select your custom resource pack to enable it.
Texture Packs
Texture packs play a crucial role in customizing Minecraft’s visual appearance. They allow you to replace the game’s default textures with your own custom designs. This can range from subtle tweaks to complete overhauls of the game’s visual style.To use a texture pack, you’ll need to:* Download a texture pack:Find a texture pack that suits your preferences and download it.
Place the texture pack in the correct folder
Place the downloaded texture pack in your Minecraft resource packs directory.
Enable the texture pack
Launch Minecraft and navigate to the resource pack settings. Select your desired texture pack to enable it.
Last Recap
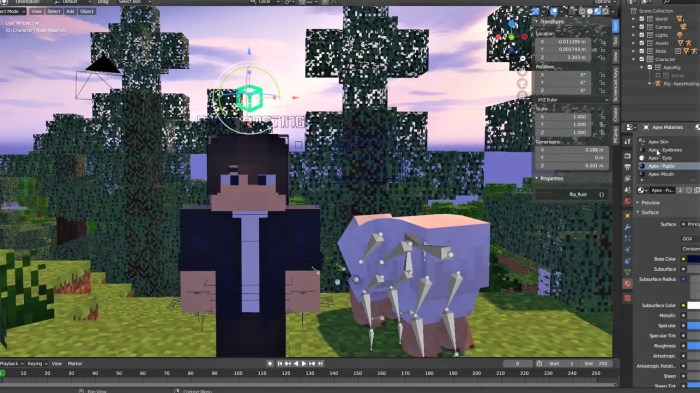
By harnessing the power of Blender, you can elevate your Minecraft creations to new heights. From crafting intricate structures to animating captivating characters, Blender unlocks a world of creative possibilities. This guide has provided you with the foundation to embark on your own journey of 3D Minecraft design, empowering you to bring your wildest Minecraft dreams to life.
